
The grid
- A grid consists of all producers and consumers connected through Power Lines, Power Poles, Power Towers, Wall Outlets, Train Stations and Railways. Lines are lossless and have no capacity limit.
- Power Pole Mk.1 / Mk.2 / Mk.3: 4 / 7 / 10 connections; line length between poles max. 100 m; Power Tower to Power Tower 300 m. Poles upgrade in place.
- MW = MJ/s. A building's consumption applies at 100 % clock while producing; idle production buildings draw 0.1 MW (even when underclocked below 0.1 MW).
- Buildings never run “slower” when under-supplied – the grid trips instead.
Generators
| Generator | MW (100 %) | Fuel | Water (m³/min) | Scaling |
|---|---|---|---|---|
 Biomass Burner Biomass Burner |
30 | Leaves / Wood / Mycelia / Biomass / Solid Biofuel / Packaged Liquid Biofuel | – | linear, demand-driven (cannot charge batteries) |
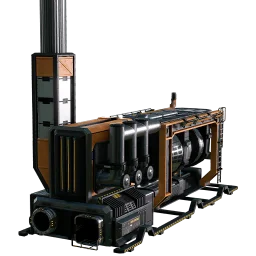
 Coal-Powered Generator Coal-Powered Generator |
75 | Coal 15/min, Compacted Coal 7.14/min, Petroleum Coke 25/min | 45 | linear |
 Fuel-Powered Generator Fuel-Powered Generator |
250 | Fuel 20, Liquid Biofuel 20, Turbofuel 7.5, Rocket Fuel 4.17, Ionized Fuel 3 (m³/min) | – | linear |
 Geothermal Generator Geothermal Generator |
100 / 200 / 400 Ø (impure / normal / pure geyser), fluctuating 50–600 | – | – | no overclock |
 Nuclear Power Plant Nuclear Power Plant |
2 500 | Uranium Fuel Rod 0.2/min, Plutonium Fuel Rod 0.1/min, Ficsonium Fuel Rod 1/min | 240 | linear |
 Alien Power Augmenter Alien Power Augmenter |
+500 and +10 % (or +30 % with 5 Alien Power Matrix/min) on total generation | Alien Power Matrix (optional) | – | max. 10 |
Fuel per minute = MW × 60 / MJ. Generators always produce at their set clock (except the Biomass Burner) – surplus goes into Power Storage or is lost; they do not throttle. Generators run only with a Power Line attached (a consumer is not necessary). Overclocking generators is linear – see Overclocking.
Power Storage (batteries)
- 100 MWh per unit; charging max. 100 MW per unit (surplus only); discharging unlimited – the shortfall is covered exactly.
- Charging from empty takes ≥ 1 h. Colours: blue charging, orange discharging, grey full/empty. 2 connections (daisy-chain); charges only from non-biomass surplus.
- A warning (like the trip sound) plays when a storage drops below 80 % while discharging. If the storage is empty and generation still too low, the fuse trips.
- Uses: buffer peak loads (Particle Accelerator, Quantum Encoder, portals, accelerating trains); night operation without extra generators. Geothermal buffer: 0.5 / 1 / 2 Power Storages per impure / normal / pure generator to guarantee the average.
Fuse and trip
- When consumption exceeds generation (and storages are empty) the grid trips: all producers and consumers stop; the sound is audible map-wide.
- Reset at the lever of a Power Pole or generator. Reduce the load first (disconnect a line, Priority Switches, pause consumers) – otherwise it trips again immediately.
- The Hoverpack draws 100 MW and does not appear in the statistics: take it off before resetting a small grid.
- If all producers are disconnected by a switch, consumers just turn off (no trip). Connecting a tripped grid to an intact one with a Power Switch trips both.
Priority Power Switch
- 8 priority groups plus “Undefined”; on impending overload groups are switched off automatically: Undefined first, then group 8, 7, … group 1 last. Switches are remote-controllable from any other Priority Switch.
- Use it to sacrifice non-critical consumers (sink lines, lighting) before the power-plant supply (Water Extractors!) fails.
- Unlock: MAM Caterium – Priority Power Switch (25 High-Speed Connector, 500 Quickwire). Plain Power Switch: MAM Caterium – Power Switch (100 Steel Beam, 50 AI Limiter).
Lines, poles, towers
| Element | Connections | Range | Cost / unlock |
|---|---|---|---|
| Power Line | lossless, unlimited power; buildings 1 connection (2 with MAM Caterium – Upgraded Power Connectors since 1.2 → daisy-chain building to building); Power Storage and lights 2 | 100 m pole to pole | 1 Wire per line; zipline-capable (even unpowered) |
| Power Pole Mk.1 / Mk.2 / Mk.3 | 4 / 7 / 10 | 100 m | Tier 0 / MAM Caterium (Mk.2, Mk.3); in-place upgrade; can be placed on a line between two poles |
| Wall Outlet Mk.1/2/3 (Shop 3/4/5 Coupons) | 4 / 7 / 10 (Double: per side, internally connected) | 100 m | 4 Wire + 1 Iron Rod / 8 Quickwire + 2 Iron Rod / 3 High-Speed Connector + 3 Steel Pipe |
| Power Tower / Power Tower Platform | 3 tower connections on top (300 m, 12 Wire per line), 4 pole connections below | 300 m | Tier 4 – Expanded Power Infrastructure |
| Railway / Train Station | conduct power (also for the Hoverpack) | – | crossings without a junction do not conduct |
Power Shards
Blue Power Slug → 1 shard, Yellow → 2, Purple → 5 (Constructor, after the MAM Power Slugs research). 596/389/257 slugs on the map → max. 2 650 shards (5 300 with a Somersloop in the Constructor). Synthetic Power Shard (Quantum Encoder): 2 Time Crystal + 2 Dark Matter Crystal + 12 Quartz Crystal + 12 m³ Excited Photonic Matter → 1 shard per 12 s (5/min), 0–2 000 MW. Other uses: Ionized Fuel (1 shard per 24 s = 2.5/min per Refinery), Alien Power Matrix research (100), AWESOME Shop (Synthetic Power Shard for 10 Coupons). See Power Slugs.
Planning rules of thumb
| Goal | Setup |
|---|---|
| 600 MW coal | 8 Coal Generators + 3 Water Extractors (360 m³/min = 8 × 45); Coal 120/min (1 Miner Mk.2 normal or Mk.1 pure) |
| 1 Pipeline Mk.1 of water | 300 m³/min = 2.5 Water Extractors → supplies 6.67 Coal Generators; practically 6 generators per Mk.1 pipe |
| 1 Refinery “Fuel” (40 m³/min) | 2 Fuel Generators (20 m³/min each) = 500 MW; by-product 30 Polymer Resin/min |
| 1 Nuclear Power Plant | 240 m³/min Water = 2 Water Extractors; 0.2 Uranium Fuel Rod/min; 10 Uranium Waste/min |
| Turbofuel | 1 Fuel Generator needs 7.5 m³/min; the standard Turbofuel recipe (Refinery, 6 Fuel + 4 Compacted Coal → 5 Turbofuel per 16 s = 18.75/min) supplies 2.5 generators |
| Geothermal | Ø 7 100 MW over all 31 geysers; output fluctuates – use Power Storage as a buffer |
The planner's summary strip shows the average MW of a factory and the Lowest power optimisation minimises it – see Using SatisfactoryBase.